💡 A bottled terrarium is one of the simplest and most visually satisfying terrariums to make. Here’s how to build one, from A to Z, in 5 steps.
You’re chilling at home, the Jack Daniels bottle is giving you looks, you recently got into terrariums, and you suddenly get this idea, an amazing idea, a terrarium in a bottle! But questions start crossing your mind. Is it possible? Will it work out?
Not only is it possible, but it’s also the easiest terrarium kind you can make. And it looks incredible.
There are so many ways you can get creative with something as simple as a bottle. Round bottles,
square bottles, wine bottles, whiskey bottles, gin bottles, mini bottles, hell, even plastic bottles. The possibilities are endless.
In this article, you’ll learn exactly how to make bottled terrariums – both open and closed. Enjoy, and get ready to create your newest masterpiece.
To create a beautiful bottle terrarium, you will need the following materials:
Any bottle will do, literally. No matter how big or small. But there are some things to consider before you pick a random green plastic bottle from your kitchen.
Sure a plastic bottle will do the job (great for kids projects), but it doesn’t really look all that spectacular does it? Look at the bottle as part of the design.
Consider:
My favorite kind of bottle to use is a liter Jack Daniels (somehow I always have one around). I like the cubical shape, and the versatility it gives me when arranging everything inside. It’s big, and it looks great (for my taste).
When choosing a bottle, keep the four aspects mentioned above in mind, design, width, size, and color. In general, any bottle will work. Here are some ideas:
Alcohol bottles are usually the best. The alcohol section in your supermarket is probably filled with all kinds of bottles with interesting shapes.
Who knew building terrariums could be so unhealthy!?
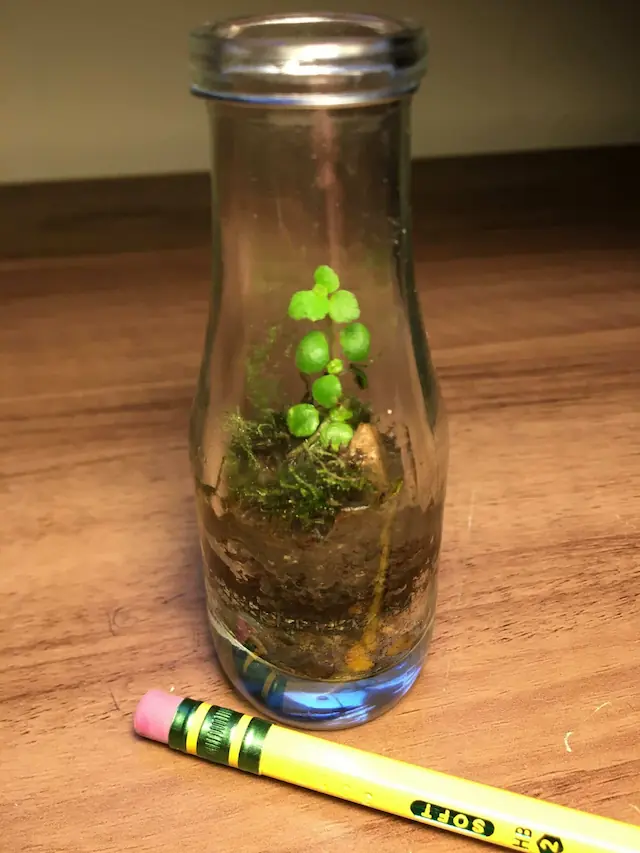
Your plant selection should be based on the type of terrarium you make:
For closed bottled terrariums you want to get plants that thrive in humid conditions. For example:
If you want to keep your bottle terrarium open, you can still use the same plants, minus the moss. But keep in mind that you will have to keep an eye on the humidity, and do some watering when the terrarium looks dry.
Now that you have everything ready, it’s time to put it all together. Follow these steps to build your bottle terrarium:
Clean the bottle and dry it out. After it’s all cleaned, it’s time to begin adding the first component.
Using the chopstick carefully make a hole in the soil for the plant to fit into.
Get the plant into the bottle.
This is the hardest step, so you have to be very patient and gentle.
If it doesn’t fit, then:
All done! Super easy. Now let’s move on to a few basic tips on light and watering, and you can then enjoy your new bottled terrarium.
To keep your terrarium healthy it’s really important that you give it adequate light and this can be achieved by placing it in a north-facing window or by using a warm white or daylight white light bulb in a regular lamp.
I recommend that you download a light meter app on your phone as this will tell you exactly how much light a certain area is getting. You’ll want a minimum of 200-foot candles and a maximum of 600-foot candles for this particular fern (Baby Nephrolepis Fern). Now, this might sound complicated but it really is simple.
These apps are very easy to use. They just turn on your front-facing camera and you hold it in the place where you want to put your terrarium.
I must stress it’s really important that you do not put your terrarium in direct sunlight.
The terrarium will need infrequent watering and it’s so important that you do not overwater it as the bottle has no drainage holes and that water will have nowhere to run off to.
The soil should be slightly damp and absolutely not wet or saturated.
If you have a lid on your bottle it’s important that you remove it every few days to allow some fresh air in. Or if the opening is small on the bottle then you’ll be able to leave the lid off permanently. But if you do this you’ll need to keep a closer eye on the levels of moisture in the soil because you don’t want the terrarium to dry out.
Don’t be alarmed if you see the old leaves die. That’s totally normal plants often shed older leaves and push out new ones.
It’s a totally normal cycle. What you can do is remove the leaves if you wish or you can add springtails to your terrarium. Springtails are a type of microfauna that feed on mold and decaying matter. A fallen leaf in a terrarium will eventually mold and decay the springtails will feed on that.
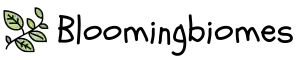
I really think that this is the easiest kind of terrain you can make because it’s just one plant in a bottle with a little bit of terrarium soil and it could not be simpler.